A well-designed workspace can boost productivity and creativity. One often overlooked aspect is the planner, a key tool for staying organized. By adding planner decorating ideas, you can make it reflect your personal style.
Having a visually appealing planner can change your daily routine. It’s not just about being useful; it’s also about adding joy and motivation. I’ll share my top tips for decorating your planner to make it both stylish and functional.
Key Takeaways
- Transform your planner into a stylish workspace accessory
- Boost productivity with a visually appealing design
- Discover simple decorating ideas for a personalized touch
- Create a functional and beautiful planner
- Make your planner a reflection of your personality
Finding the Right Planner for My Needs
Looking for the right planner can be a big task. There are many options out there, each suited for different lifestyles. Whether you’re busy at work or studying, the right planner can really help you stay organized.
Types of Planners I Love
There are many planners that stand out, each with its own special features. Bullet journals let you get creative and customize your planner. On the other hand, pre-structured planners offer a more traditional way to organize.
Some popular planners include:
- Daily planners for scheduling appointments and tasks
- Weekly planners for a broader view of the week
- Monthly planners for long-term planning
- Travel planners for documenting adventures
Choosing Between Digital and Paper
The debate between digital and paper planners is ongoing. Digital planners are convenient and easy to access. They also sync across devices. On the other hand, paper planners offer a hands-on experience and a break from screens.
A quote from a renowned productivity expert highlights the benefits of using a planner: “A planner is not just a tool for keeping track of appointments; it’s a companion in achieving your goals.” –
| Planner Type | Features | Benefits |
|---|---|---|
| Digital Planner | Syncs across devices, reminders, and notifications | Convenient, accessible, and customizable |
| Paper Planner | Tactile experience, creative freedom, and no screen time | Enhances creativity, reduces screen time, and provides a sense of accomplishment |
Size Matters: Which Planner Fits Best?
The size of your planner is also important. A5 and B6 sizes are favorites among planner fans. They offer a good balance between being portable and having enough space to write. The best size for you depends on how you plan to use your planner.
By thinking about these factors and trying out different planners, you can find the perfect one. It will help boost your productivity and organization.
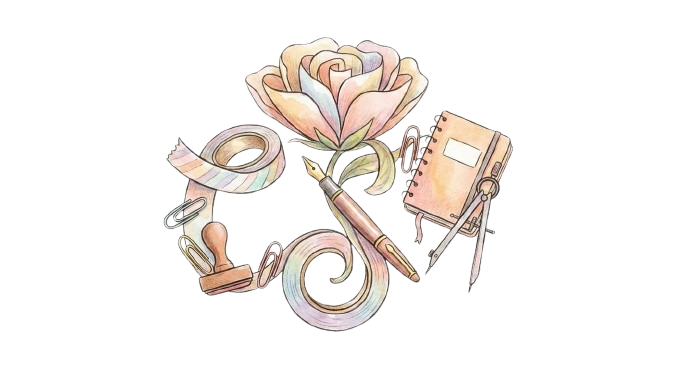
Essential Supplies I Use for Planner Decoration
To make my planner special, I use many essential supplies. Decorating my planner is more than just making it look good. It’s about creating a space that inspires me to be productive and creative.
My journey into planner decoration started with learning the basics. I learned what makes a planner functional and visually appealing. Over time, I’ve gathered a list of must-have supplies to achieve my desired layouts.
Stickers and Washi Tape: My Favorites
Stickers and washi tape are my top picks for adding a personal touch. They come in many designs, colors, and patterns. This makes it easy to match them with my monthly themes or personal style.
- Stickers: I use stickers to highlight important dates and tasks. They can be functional or just for decoration.
- Washi Tape: Washi tape is versatile. It can be used to create borders, separate sections, or as a bookmark. Its gentle adhesive won’t damage my planner pages.
Pens and Markers That Pop
Colorful pens and markers add vibrancy and interest to my planner. They help me create headers, decorate margins, and highlight important information.
I like using fine-tip pens for detailed work and thicker markers for bold statements. My favorite brands are Faber-Castell and Tombow, known for their quality writing instruments.
| Supply | Brand | Use |
|---|---|---|
| Fine-tip Pen | Faber-Castell | Detailed work, headers |
| Markers | Tombow | Color coding, decorations |
| Washi Tape | MT Washi Tape | Borders, section dividers |
Rulers and Stencils for Precision
For those who value precision in their planner layouts, rulers and stencils are key. They help create straight lines, uniform shapes, and consistent lettering.
I use straight-edge rulers and curved stencils to add variety to my designs. These tools help my planner pages look neat and professional.
By using these essential supplies, I create layouts that are beautiful, functional, and inspiring.
Color Schemes That Inspire Me
Choosing the right color scheme can turn my planner into a daily source of inspiration. A good palette makes my planner look great and boosts my mood and productivity.
Choosing a Palette for Each Month
I change my planner’s colors every month to keep it fresh. For spring, I use pastels, and for autumn, warm tones. I pick planner stickers and decor that match the season.
First, I pick a theme for the month. Then, I choose core colors that fit the theme. I use these colors in all my spreads for the month.
Using Neutrals with Pops of Color
I start with a neutral base to keep my planner tidy. I often use white, gray, or beige as my main colors. Then, I add DIY planner decor in bold colors for interest.
This way, I keep my planner clean and organized. But I also get to show off my creativity with bright accents.
Seasonal Themes I Enjoy Playing With
Seasonal themes make decorating my planner fun. For the holidays, I use red and green stickers and washi tape for a festive look.
| Season | Color Palette | Decoration Ideas |
|---|---|---|
| Spring | Pastel colors (pink, blue, yellow) | Floral stickers, green washi tape |
| Summer | Bright colors (orange, red, turquoise) | Beach-themed stickers, colorful washi tape |
| Autumn | Warm tones (orange, brown, gold) | Leaf stickers, earth-toned washi tape |
| Winter | Cold colors (blue, silver, white) | Snowflake stickers, icy washi tape |
Using seasonal themes and colors keeps my planner decoration exciting all year. It makes planning more fun and creative.
How I Incorporate Functional Decoration
I’ve found that a well-decorated planner is more than pretty. It’s also super useful. By adding elements that boost productivity, my planner helps me reach my goals.
Designing to Enhance Productivity
For me, planner decoration is all about being useful and looking good. I design layouts that boost my productivity. I make sure there are clear sections for tasks and use colors to show what’s important.
- Use clear headings and labels to categorize tasks.
- Incorporate symbols or colors to indicate priority levels.
- Leave space for notes and adjustments.
For more planner ideas, check out Passion Planner’s blog. It’s full of great tips.
Sections I Label and Customize
Labeling and customizing my planner is key to staying organized. I use stickers, washi tape, and colorful pens to mark different areas.
- Identify key sections that need clear labeling, such as appointments or to-do lists.
- Use a consistent color scheme or symbol for each type of task.
- Customize as needed to reflect changes in your schedule or priorities.
Functional Layouts I Swear By
Some layouts are must-haves for me. I love daily logs, weekly spreads, and monthly overviews. Each layout helps me manage my tasks and appointments.
By mixing these layouts with decorations, my planner is both beautiful and useful. Remember, “A planner is not just a tool; it’s a reflection of your personal productivity system.”
“A planner is a story of your life, told day by day, task by task.”
This way of decorating my planner boosts my productivity and makes planning fun.
The Power of Personal Touches
I’ve found that adding personal touches to my planner makes it more than just a tool. It becomes a reflection of my personality. This makes me more motivated to use it.
One way I make my planner special is by including photos and mementos. These can be memories from big events, loved ones, or beautiful places. They remind me of what’s truly important.
Photos and Mementos I Include
I enjoy adding small keepsakes or photos to my planner. For example, a tiny ticket stub from a concert or a family photo adds a personal touch. I use stickers and washi tape to keep these items in place without harming the pages.
These personal touches not only make my planner look good. They also connect me to the things that matter most.
Quotes That Motivate Me Daily
I also add motivational quotes to my planner. These quotes help me stay on track and motivated, even on tough days. I write them in fancy lettering or use stickers with uplifting messages.
With these personal touches, my planner is more than a way to stay organized. It’s a source of inspiration and motivation.
Layering Techniques for Depth
Adding depth to my planner pages is all about mastering the art of layering. By combining different elements, I can create visually appealing and functional spreads. These spreads keep me organized and inspired.
One of the key aspects of layering is using different textures to add depth and interest. I love incorporating various materials into my planner, such as washi tape, paper cuts, and fabric scraps. These textures not only add visual appeal but also create a tactile experience.
Using Different Textures
Textures play a significant role in making my planner pages stand out. Some of my favorite textures include:
- Washi tape for a subtle, adhesive layer
- Paper cuts for intricately designed shapes
- Fabric scraps for a soft, fabric texture
- Die-cuts for precise shapes and designs

Combining Stickers with Paper Cuts
Combining stickers with paper cuts is another effective layering technique. By mixing and matching different shapes, sizes, and colors, I can create unique and eye-catching designs. For example, I might layer a large sticker behind a paper cut-out to create a sense of depth.
Some tips for combining stickers with paper cuts include:
- Start with a base layer, such as a sticker or a background color
- Add a secondary layer, like a paper cut-out or a die-cut
- Experiment with different combinations to find the perfect balance
By incorporating these layering techniques into my planner decoration, I can create beautiful and functional spreads. Whether I’m using washi tape, paper cuts, or a combination of both, I’m able to add depth and visual interest to my planner pages.
Monthly Spreads: My Creative Process
Creating monthly spreads is a mix of planning, creativity, and the right bullet journal supplies. I start by picking a theme or color scheme for the month. This choice helps me pick the right planner accessories and design elements.
Techniques for Eye-Catching Designs
To make my designs stand out, I use several techniques. I mix colors and patterns with my planner accessories, like stickers, washi tape, and colorful pens. This makes my spreads more interesting and engaging.
I also layer different elements like paper cuts, stickers, and stamps. This adds depth and makes my designs more dynamic. It also helps highlight important information.
Balancing Aesthetics and Function
While looks are key, my spreads must also be functional. I make sure to include essential info like calendars, to-do lists, and deadlines clearly and organized.
I use headers and dividers to section off parts of my spread. This makes it easier to navigate. With bullet journal supplies like stencils and rulers, I can create layouts that are both beautiful and useful.
Finding the right balance between creativity and practicality is the secret to a great monthly spread. With the right planner accessories and techniques, I can create spreads that inspire me and keep me organized all month.
Daily Logs: Keeping It Stylish
Making my daily log stylish has turned planning into a fun activity. It’s more than jotting down tasks; it shows my daily life and productivity. A pretty daily log makes me want to use it every day.
Simplifying My Daily Tasks
To keep my daily tasks simple, I keep my log clean and organized. Here’s how:
- I use different colors or symbols for tasks.
- I break big tasks into smaller ones.
- I stick to a layout that’s easy to read.
Creative Headers I Use
Creative headers make my daily log stand out. I like to use:
- Colorful markers for important dates or events.
- Stickers to add a personal touch to everyday tasks.
- Washi tape for dividers or to separate sections.
These add-ons not only look good but also help me organize better.
| Header Type | Purpose | Example |
|---|---|---|
| Colorful Markers | Highlight Important Dates | Red marker for deadlines |
| Stickers | Add Personality | Fun stickers for routine tasks |
| Washi Tape | Create Dividers | Striped washi tape for sections |
Seasonal and Holiday Inspirations
Seasonal and holiday themes are key in my planner decoration. They show off my personality and style. Using elements of the season or holidays keeps my planner exciting all year.
I use seasonal themes that match the time of year. For winter, I pick icy blues and whites with snowflakes and holly. Summer brings bright colors and flowers, making my planner lively.
Festive Themes that Brighten My Planner
Festive themes add fun to my planner. I use themed stickers, washi tape, and inserts for a cohesive look. For Halloween, I go for orange and black with spider webs and pumpkin stickers.

Seasonal Stickers and Their Impact
Planner stickers are vital for my seasonal decor. They change a page and add a personal touch. I use them for dates, borders, or color. Seasonal stickers, like snowmen or flowers, keep my planner themed.
With seasonal themes and planner stickers, my planner stays engaging. It reflects my surroundings and interests. This makes my planner not just pretty but also useful.
Sharing My Planner Decor on Social Media
Sharing my planner decor on social media has opened up a whole new world for me. It’s amazing to see how my passion for planner decoration connects with others who share my interests.
Platforms I Use to Showcase My Work
I use several social media platforms to show off my planner decorating ideas. My top choices are Instagram and Pinterest, where I can share high-quality images of my planner spreads.
On Instagram, I post pictures and videos of my planner decor. I use relevant hashtags to reach more people. I also engage with others by commenting and liking their posts.
- Instagram: For visual storytelling and community engagement
- Pinterest: For sharing inspiration and ideas through images
- YouTube: For video tutorials and detailed planner spreads
| Platform | Content Type | Engagement |
|---|---|---|
| Photos, Videos | Comments, Likes | |
| Images, Infographics | Repins, Comments | |
| YouTube | Video Tutorials | Comments, Subscriptions |
Engaging with Fellow Planner Enthuasiasts
Engaging with fellow planner enthusiasts is key for me. I love seeing how others decorate their planners and sharing tips and ideas.
By joining online communities for planner decoration, I’ve learned new techniques. I’ve also shared my own experiences and connected with others who share my passion.
Some ways I engage include:
- Commenting on posts with feedback or questions
- Sharing user-generated content to showcase community creativity
- Participating in challenges and contests to stay inspired
Through these interactions, I’ve not only improved my DIY planner decor skills. I’ve also built a supportive network of fellow planner enthusiasts.
Staying Organized Amidst Decoration
My planner is both a creative space and a tool for staying organized. I’ve learned to balance these two aspects. As I decorate and personalize my planner, I keep it functional and easy to use.
Strategies for Maintaining Functionality
To keep my planner organized, I focus on key strategies. First, I make sure all important info is easy to find. This includes dates, contacts, and often-used sections.
- Use clear headings and labels for each section.
- Keep frequently used pages near the front of the planner.
- Utilize tabs or dividers to separate different sections.
These strategies help me keep my planner organized, even with decorations.
Tips for Quick Clean-Ups and Reorganization
Regular clean-ups are key to keeping my planner organized. I take time each month to review it, remove unnecessary items, and reorganize if needed.
- Remove any expired or irrelevant information.
- Refile or recycle any loose papers or inserts.
- Update my planner’s layout if necessary to reflect changes in my schedule or priorities.
By following these tips, my planner stays stylish and functional. It continues to be an effective tool for staying organized.
Adding planner accessories like stickers, washi tape, and colorful pens makes it personal. It also helps highlight important info and makes my planner more appealing.
Planner Decoration Challenges and Solutions
Decorating my planner has brought up several challenges. These include overcoming creative blocks and dealing with distractions and clutter. But, I’ve found some effective ways to stay on track.
Breaking Through Creative Blocks
When I hit a creative block, I look to my bullet journal supplies for inspiration. Using washi tape in different colors and patterns can add a fresh touch to my planner spreads.
Managing Distractions and Clutter
To keep my planner clutter-free, I use a storage case for my supplies. This keeps me focused. I also clean up my planner regularly and remove anything I don’t need.
By using these strategies, you can overcome common challenges and keep decorating your planner fun. With the right tools, like washi tape and a good storage system, you can keep your creativity flowing.